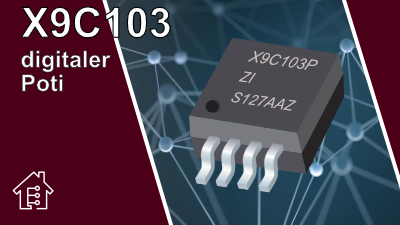
X9C103 – digital potentiometer
von Edi · 20/11/2023
The X9C103 is a digital, serial, non-volatile potentiometer from Intersil that is used in various electronic applications. The IC is available in two versions. As SOIC (Small outline IC) and as PDIP (Plastic Dual-In-Line Package) which fits into our breadboard.
The IC consists of a resistor series with 99 temperature-compensated resistor elements and a wiper switching network. There are contact points between the individual elements and at both ends, which are accessible for the slider connection. The position of the wiper element is controlled by the inputs CS, U/D and INC.
The position of the slider can be stored in a non-volatile memory and recalled at a later switch-on process.
There are four different types, which differ in their resistance value.
The digital potentiometer is used to regulate voltages, settings and trimming in various circuits.
X9C103 - Pin-out
The X9C103 IC has eight connections, voltage input and GND on pins 8 (VCC) and 4 (VSS) and pins 3, 5 and 6 correspond to the fixed connections of a mechanical potentiometer. The control pins INC, U/D and CS inputs control the movement of the wiper along the resistance field. If CS is set to LOW, the device is selected and activated to respond to the U/D and INC inputs. An overview of the commands can be found in the table – Mode selection from the data sheet.
Practical example
The sketch
#include
const byte CS_Pin = 6;
const byte buttonPinSAVE = 7;
const byte buttonPinDOWN = 8;
const byte buttonPinUP = 9;
const byte UD_Pin = 10;
const byte INC_Pin = 11;
const byte debounceInterval = 10; // Zeit in (ms) für depounce
Bounce2::Button buttonSAVE = Bounce2::Button();
Bounce2::Button buttonDOWN = Bounce2::Button();
Bounce2::Button buttonUP = Bounce2::Button();
void setup() {
pinMode(buttonPinSAVE, INPUT_PULLUP);
pinMode(buttonPinUP, INPUT_PULLUP);
pinMode(buttonPinDOWN, INPUT_PULLUP);
pinMode(CS_Pin, OUTPUT);
pinMode(INC_Pin, OUTPUT);
pinMode(UD_Pin, OUTPUT);
buttonSAVE.attach(buttonPinSAVE);
buttonSAVE.interval(debounceInterval);
buttonUP.attach(buttonPinUP);
buttonUP.interval(debounceInterval);
buttonDOWN.attach(buttonPinDOWN);
buttonDOWN.interval(debounceInterval);
}
void loop() {
buttonSAVE.update();
buttonUP.update();
buttonDOWN.update();
if (buttonSAVE.fell()) {saveValue();}
if (buttonUP.fell()) {countUp();}
if (buttonDOWN.fell()) {countDown();}
}
void countUp() {
digitalWrite(UD_Pin, HIGH);
digitalWrite(CS_Pin, LOW);
delay(5);
digitalWrite(INC_Pin, HIGH);
delay(5);
digitalWrite(INC_Pin, LOW);
delay(5);
}
void countDown() {
digitalWrite(UD_Pin, LOW);
digitalWrite(CS_Pin, LOW);
digitalWrite(INC_Pin, HIGH);
delay(5);
digitalWrite(INC_Pin, LOW);
delay(5);
}
void saveValue() {
digitalWrite(CS_Pin, LOW);
digitalWrite(INC_Pin, HIGH);
delay(5);
digitalWrite(CS_Pin, HIGH);
delay(20); // 20 Millisek. für das Speichern
digitalWrite(INC_Pin, LOW);
delay(5);
}
Material
Click here for the sketches on Github
Letzte Aktualisierung am 2.05.2024 / Affiliate Links / Bilder von der Amazon Product Advertising API